
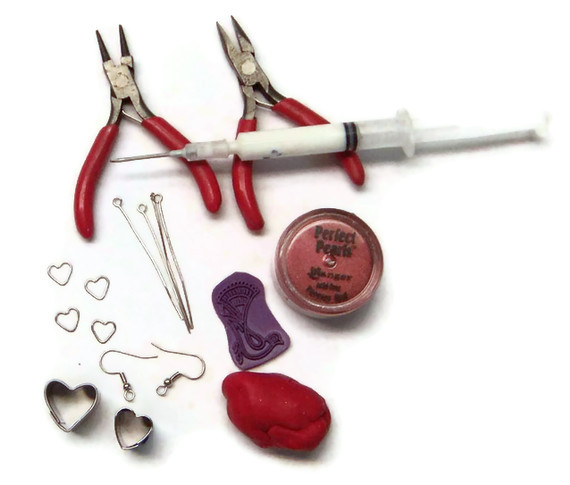
Materials needed:
red polymer clay (I used Premo Red Sparkle)
liquid polymer clay (I use a syringe to apply mine)
red Pearl Ex or Ranger Perfect Pearls powder
stamp of choice (I chose a small peacock stamp and just use the tail)
2 heart shaped cutters, 1 larger, 1 smaller
French wire ear hooks, or your choice of earrings
4 2" eye hooks
4 heart shaped jump rings (you can also use regular round jump rings)
round nose pliers
flat nose pliers
wire cutters
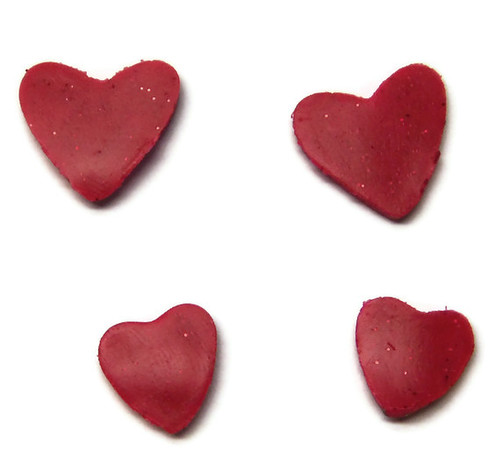
Condition your clay by running it through your pasta machine about 20 times and roll it out on the #3 setting on your pasta machine. You can also condition the clay by hand and use a roller to flatten the clay if you don't have a pasta machine. Use the large cutter to cut out 2 hearts. Do the same with the small cutter. These will be the backs of your earrings.
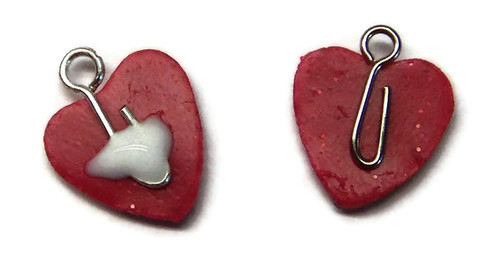
Place one eye hook on each of the larger hearts, as shown in the picture below. Add a little liquid polymer clay over the wires. This helps secure the wire and will also help the top heart adhere to the bottom one. We'll cut the eye pins to the proper length and form a loop at the bottom after they're baked.

For the smaller hearts cut the remaining 2 eye hooks to about 3/4" long and bend the end to form a hook. Place these on the smaller hearts as shown and cover with a little liquid polymer clay.

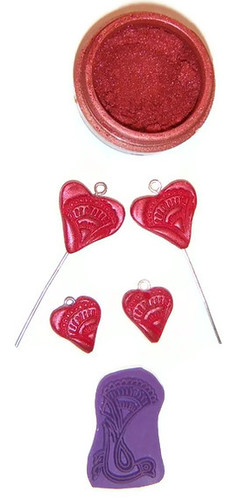
Next use your stamp to impress a design on each of the hearts. Any stamp with nice detail will work. I just used the tail of the peacock for these hearts. Spritzing the stamp with water will help to keep it from sticking to the clay. I always keep a spray bottle handy. This also works as a release agent for molds (spritz the mold, then press the clay into the mold). Gently blot off any excess water from your stamped hearts and use your finger to gently rub the red Pearl Ex powder onto the raised surfaces of the design. If your hearts become slightly squished you can reshape them now. If excess liquid polymer clay comes out of the seams or the hole for the eye pin just carefully wipe it away.
If you're using Premo polymer clay bake the earrings at 275 degrees for 30 minutes. If you're using another brand of clay be sure to check the baking directions on the package. An oven thermometer can help make sure your oven is at the proper temperature. After the hearts are cool brush them with two coats of varnish to protect the Pearl Ex powder. I used Fimo Gloss Varnish for these. Always make sure your varnish is compatible with polymer clay. If it's not your piece may never dry completely. Once the varnish has dried (about 20 minutes for the Fimo varnish) you can assemble your earrings.
To assemble your earrings, cut the end of the eye pin on the larger hearts to about 1/4" long and use your round nose pliers to form a loop. Use the heart shaped jump rings to attach the large hearts to the ear wires and the small hearts to the large ones. You should end up with something that looks like this. If you can't find heart shaped jump rings (I got mine from Fire Mountain Gems) you can also use regular round jump rings.
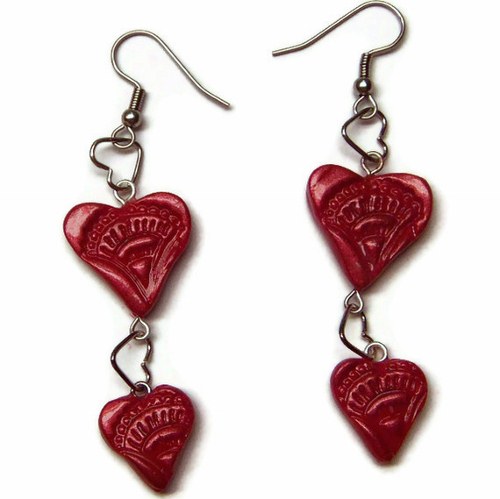
And there you go! Pretty red stamped polymer clay earrings- perfect for Valentines Day! ;-)
~Michelle of CreativeCritters
1 Smooshing Thoughts:
What a very cute idea! I love it
Post a Comment